Learn How to Draw a Panda Holding a Piece of Bamboo

Photo: Stock Photos from James Kirkikis/Shutterstock
This post may contain affiliate links. If you make a purchase, My Modern Met may earn an affiliate commission. Please read our disclosure for more info.
Pandas are some of the most beloved animals on the planet, and it's easy to understand why. Their striking black-and-white markings, plush bodies, and playful demeanor make them a joy to look at. Even if you can't see these bears in person, a great way to celebrate their charm is by rendering their likeness on paper.
This tutorial will teach you how to draw a panda sitting while holding a shoot of bamboo. All you'll need to get started is a few reference photos of a panda, some drawing supplies, and paper. Ready to get started? Then let's draw a panda!
Learn how to draw a panda with these step-by-step instructions.
Step 1: Draw a circle

Photo & Art: Margherita Cole | My Modern Met
Begin by sketching a circle for the head of the panda.
Step 2: Add two ears
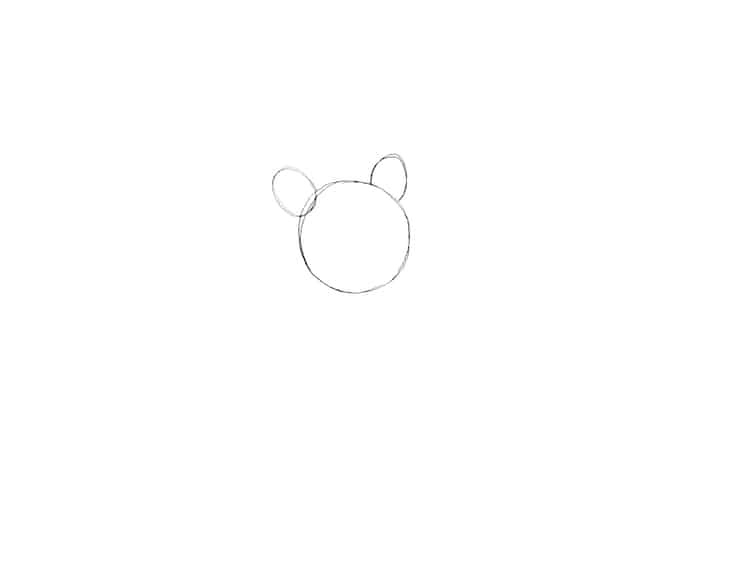
Photo & Art: Margherita Cole | My Modern Met
Next, add a pair of oval-shaped ears on either side of the circle.
Step 3: Add the eyes and nose
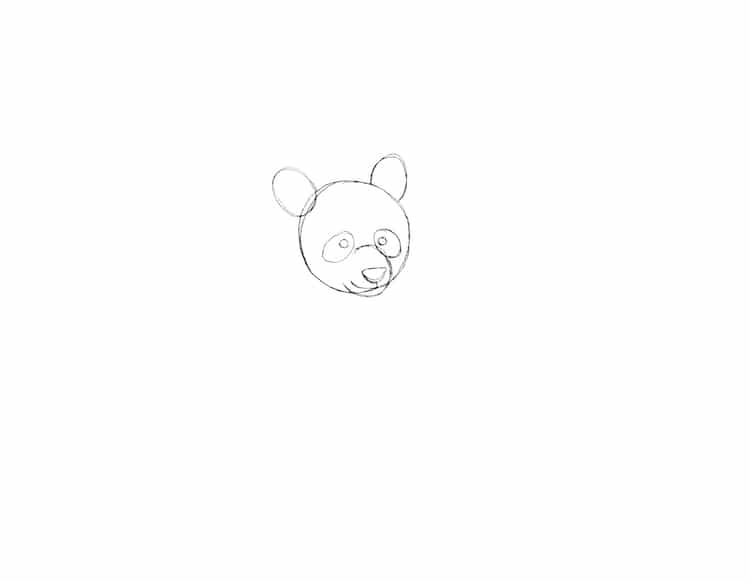
Photo & Art: Margherita Cole | My Modern Met
Move your pencil halfway down the panda's head and lightly sketch two small, circular eyes. Remember to frame them inside two sideways ovals that point towards the center of the face—these will be the black mask markings later on.
Afterward, draw a half circle protruding from the bottom of the head to create the snout of the panda. Add a large, triangle-shaped nose inside.
Step 4: Draw the back
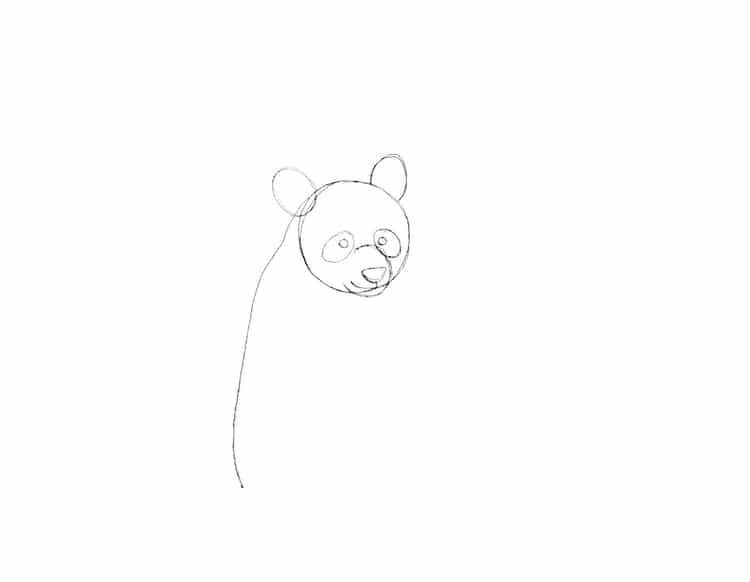
Photo & Art: Margherita Cole | My Modern Met
Create the back of the panda by drawing a line from the top of the head and going downwards at an angle. You'll want the line to veer slightly outwards, as this will help define the back from the neck. This line should be about two heads long.
Step 5: Create the body
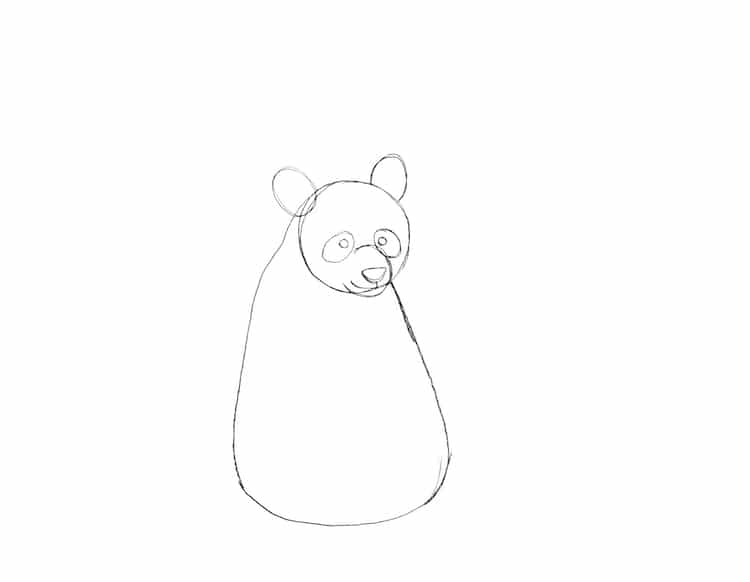
Photo & Art: Margherita Cole | My Modern Met
Use the line from step 4 to create a bell-shaped body.
Step 6: Add the forearms
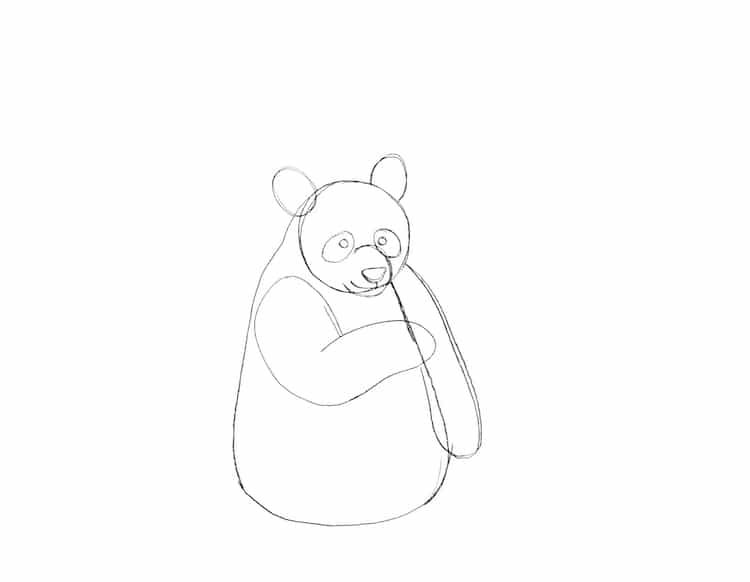
Photo & Art: Margherita Cole | My Modern Met
Now that we've created a body, it's time to add the limbs. Using soft, rounded shapes, sketch a pair of arms on either side of the panda's shoulders. Later on, we will add a bamboo shoot, so remember to fold one arm across the panda's chest.
Step 7: Add the hindlegs
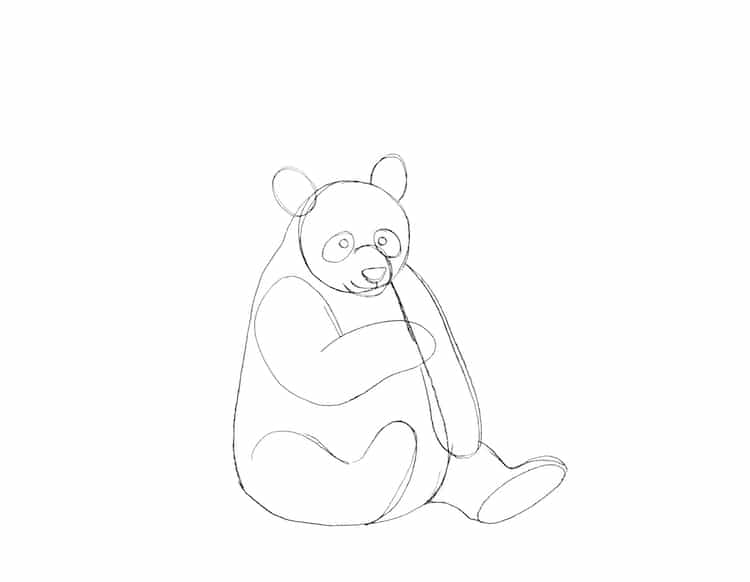
Photo & Art: Margherita Cole | My Modern Met
Pandas have very plush bodies with thick fur, so in this step, draw similarly soft hind legs at the bottom of the bell-shaped body. In addition to using reference photos of pandas, consider looking at some photos or real-life teddy bears to help you render the relaxed position of the limbs.
Step 8: Refine the face and body
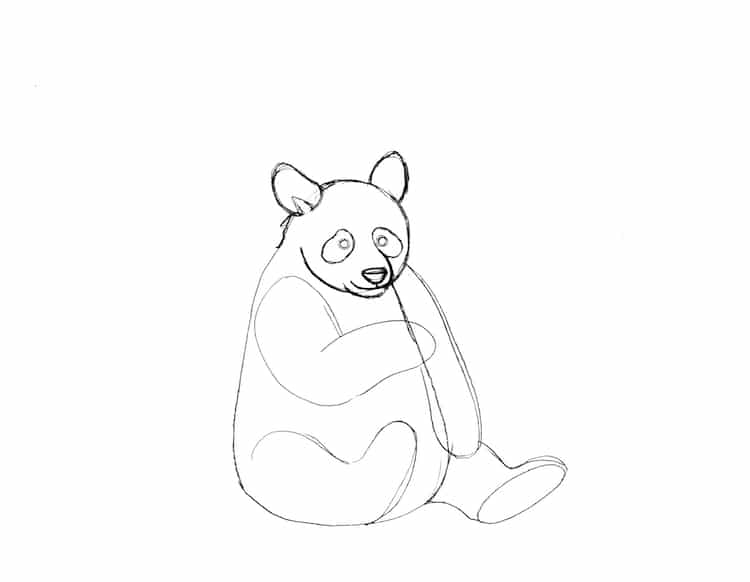
Photo & Art: Margherita Cole | My Modern Met
At this point, we've drawn all of the elements of the panda's body, so it's time to give it more definition. Starting at the head, erase the unnecessary guidelines and refine the shapes of the ears and snout.
As you work your way down, continue adding textured lines around the fluffiest parts of the panda—chest, stomach, and paws. Then, while looking at some reference photos, sketch the lines of the panda's black markings. Typically, the ears, eyes, and all of the limbs will be black.
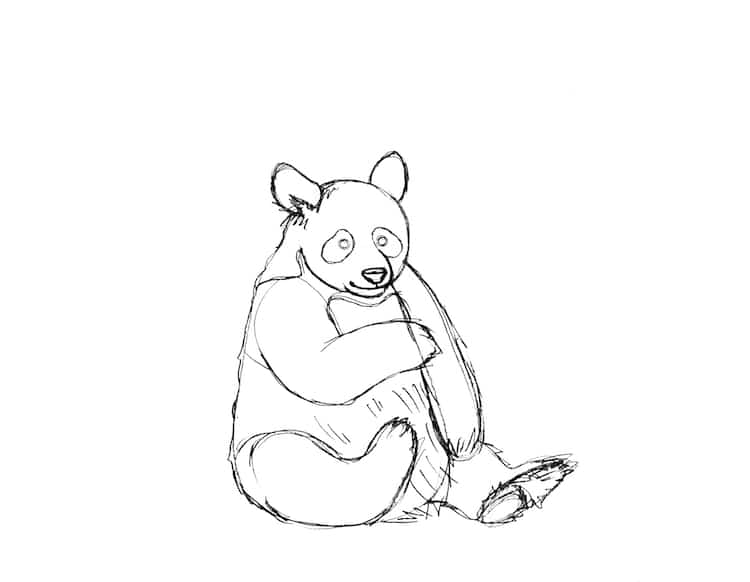
Photo & Art: Margherita Cole | My Modern Met
Step 9: Sketch bamboo
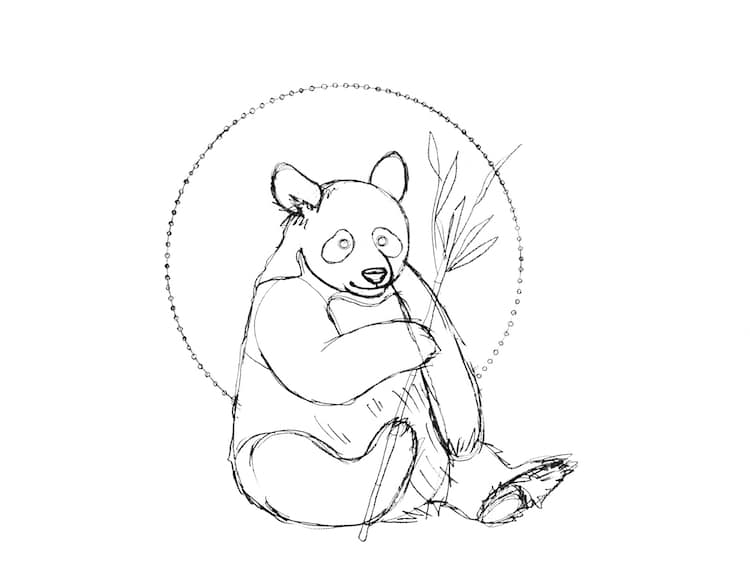
Photo & Art: Margherita Cole | My Modern Met
After taking a look at some reference photos, sketch one shoot of bamboo inside the grip of the panda's paw using long and thin rectangular shapes. Add a few slender leaves at the top.
If you would like to frame your panda without drawing a background, then consider adding a decorative border. This will enhance your illustration without too much time or effort. All you need is a protractor or compass to measure a circle around the bear's head, and then sketch small dots along the rounded line.
Step 10: Go over the drawing in ink
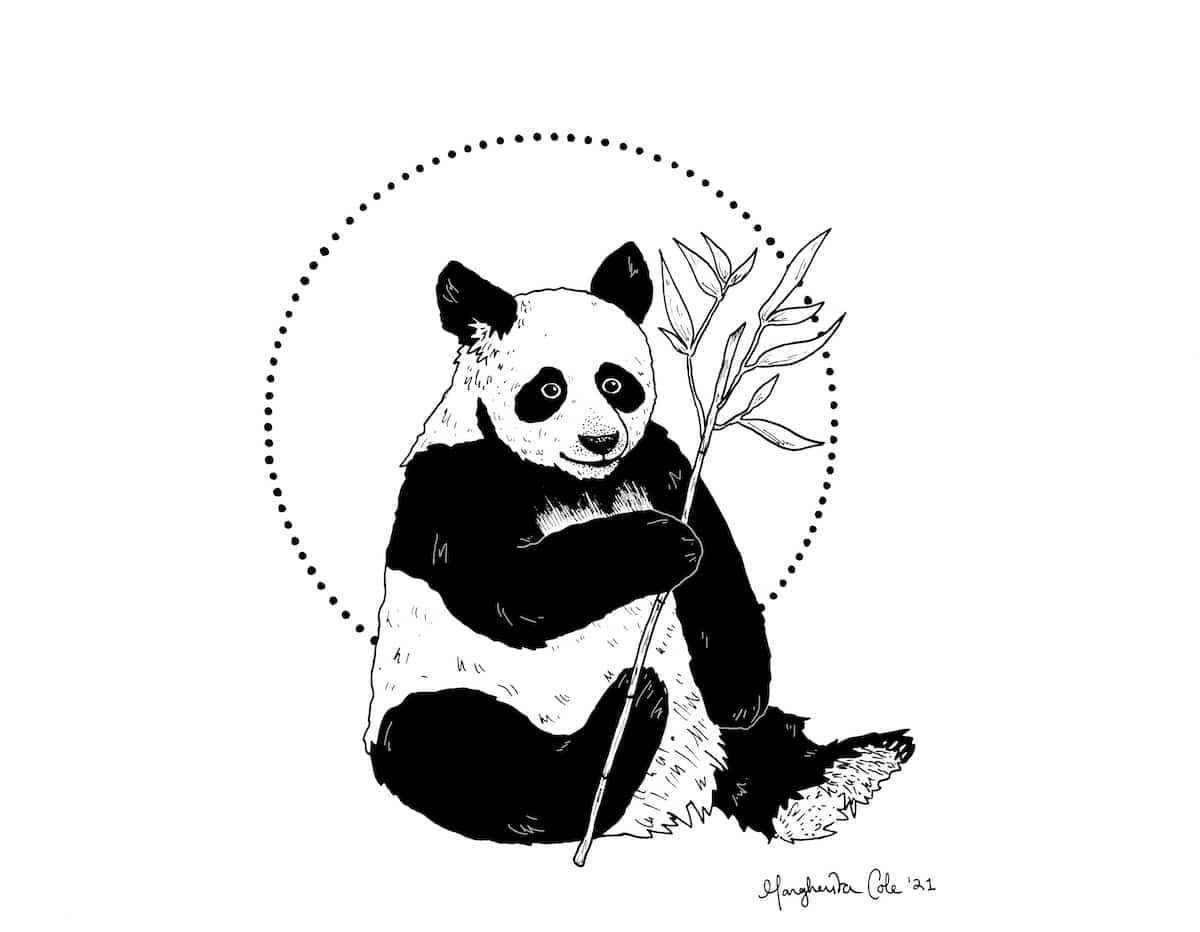
Photo & Art: Margherita Cole | My Modern Met
Finally, it's time to go over our drawing in ink. Place a scrap of paper under your drawing hand and slowly go over the sketch with a pen. Once you've gone over all of the marks, including the border, you can begin filling in the large areas of black. It's important to leave this step until last, otherwise, you risk smearing the ink.
When you're satisfied with how your composition turned out, you can make it official by signing and dating your art. Good job!
Looking for others who love drawing? Join our Art, Design, Photography, and Drawing Club on Facebook!
Related Articles:
Learn How to Draw a Cow Lying Down in a Field
Learn How to Draw a Polar Bear Step by Step
0 Commentaires